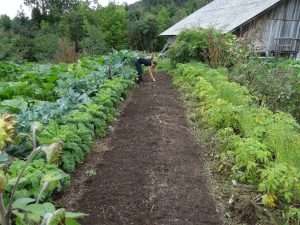
Asian vegetables come in all shapes and sizes and offer an exciting alternative to their western counterparts. They can be a talking point at any dinner party or only a healthy addition to your favorite meals.
While many of them originate in Asia, with a few tips and tricks, you can pick up your favorite Asian vegetable seeds and grow them at home as well.
In this comprehensive guide, our expert gardeners reveal the secrets to growing delicious Asian veggies at home. So, get ready to dig in!
JUMP TO TOPIC
The ultimate list of Asian vegetables to grow at home
There are so many different Asian veggies to tuck into that it can be challenging to know where to start. As well as familiar names like edamame and Chinese cabbage, there’s a vast range of more exotic beans, gourds, root veg, and more to discover.
In this guide, we’ll break some of our absolute favorites into 7 distinct categories.
Here’s what to expect.
| Asian cabbage, kale and more | Chinese spinach | Asian legumes | Asian gourds | Asian herbs | Asian root vegetables | Asian nightshades |
| Tatsoi Hon-Tsai-Tai Tokyo bekana Gai lan Napa cabbage Komatsuna Senposai Pak choy / Bok choy Choy sum / Yu choy Kohlrabi Korean cabbage Taiwan cabbage |
Malabar spinach Red amaranth Water spinach Edible amaranth Chinese spinach |
Edamame Dou miao Yardlong beans Hyacinth beans Winged beans Azuki bean Guar |
Tinda / Indian squash Japanese squash / Kabocha Bitter melon Snake gourd Winter melon Bottle gourd / Calabash Edible luffa Angled luffa Hairy gourd / Mo Qwa Korean melon |
Thai basil
Shiso / Perilla Okahijiki |
Water-melon radish Gobo root / Burdock Kuroda carrots Daikon radish |
Tomatoes / Momotaro tomato Chinese eggplant Indian eggplant Japanese eggplant Korean eggplant Filipino eggplant Thai eggplant White eggplant Oriental sweet peppers Chi chien pepper Korean long green pepper |
Growing guides for our top Asian vegetables
Oriental vegetables might look exotic and somewhat different from the eggplants, kale, and cabbages you’re used to, but in the garden, they behave in much the same way. This section has split up some of the most popular Asian veggies into 7 distinct growing guides.
Each guide is packed full of information about how you can raise a variety of delicious Chinese, Indian, Japanese, and Southeast Asian vegetables at home, all grown from oriental vegetable seeds.
1. How to grow Asian kale, broccoli, cabbage, mustard greens, and more
Use this guide for growing:
- Tatsoi
- Hon-Tsai-Tai
- Tokyo bekana
- Gai lan
- Napa cabbage
- Komatsuna
- Senposai
- Pak choy / Bok choy
- Choy sum / Yu choy
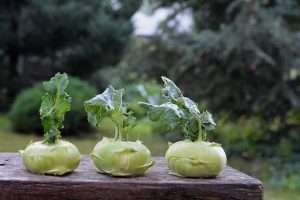
- Kohlrabi
- Korean cabbage
- Taiwan cabbage
Chinese cabbage, kale, broccoli, and other Asian mustard-greens are all part of the same family; Brassicaceae. For the most part, they’re all varieties and hybrids of either wild cabbage (Brassica oleracea) or field mustard (Brassica rapa).
As such, they all share similar growing conditions.
Let’s take a look.
– Germination
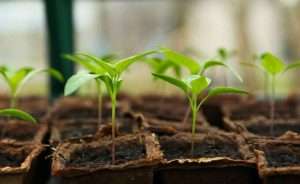
All of the plants in this section are pretty easy to grow from seeds, and we recommend germinating them indoors first of all. We like to use compostable seed pots for this, as they reduce the risk of transplant shock and are easy to plant outside when the time comes.
Simply fill each pot with compost or potting mix, push a shallow hole in the soil and place a single seed in each pot. Then, gently cover the seed with a thin layer of soil. Water the seeds daily using a water spray, giving them a fair amount but not drowning them.
Depending on the specific plant, it can take anywhere from 7 to 21 days until the seeds have germinated and are ready to transplant. In general, the seedlings should be around 2 inches (5cm) tall, with two sets of leaves each.
– Temperature and when to plant outside
Brassicaceae are cold season crops and can tolerate reasonably frigid temperatures. Like choy sum, some benefit from growing during colder temperatures rather than warm, gaining a sweeter taste and more tender stems.
As such, spring and autumn are good times to plant these crops but avoid freezing temperatures. For the best results, aim for a temperature range of between 55°F (13°C) to 77°F (25°C).
– Location
These plants enjoy the sunlight, but the harsh, direct midday sun can give them problems. Ideally, they should be sheltered from direct sun but not kept into the complete shade. A partially shaded area is excellent.
When planting your seedlings, be sure to give them enough space to grow. This will vary depending on the exact vegetables you’re growing, but between 6 and 12 inches apart is generally a good rule of thumb.
– Soil
When transplanting your seedlings, prepare the soil by loosening it up. Give it a depth of around 12″ (30 cm) and removing any weeds. Most of these vegetables benefit from well-draining soils with a pH ranging from 6.0 to 7.0.
If you have thick, clay-heavy soil in your garden, be sure to add soil amendments such as peat moss, bark, or coir to improve the drainage. You can also mix compost into your soil to create a nutrient-rich substrate.
– Watering
While germinating Chinese cabbage or broccoli varieties, it’s good to give them a rather thorough watering, either once or twice a day, depending on the vegetable you’re growing.
Once the plants are established, it’s essential to ensure that the soil remains moist but not soaked. These plants all benefit from regular watering, and ensuring that the top 5 inches of soil are kept moist is ideal for a successful harvest.
It’s best to water them either in the morning or early evening and avoid watering them in the middle of the day. If it’s been very dry, be sure to keep an eye on your plants and water them more regularly if necessary.
– Fertilizer
This family of Asian vegetables isn’t too fussy about fertilizer, though it’s best to mix in some compost or slow-release organic fertilizer with your soil from the beginning. Mulch is also a great addition, as it will deter weeds and help moisture retention in the soil.
Otherwise, a good amount of light and water is all they need to create a tasty harvest.
However, if you feel your plants could use a boost or don’t have particularly rich soil, you can apply a liquid, nitrogen-rich fertilizer every 10 days or so.
– Harvesting
While these plants are all closely related, they’re not all harvested in the same way. Some plants, such as gai lan and choy sum, are grown for their tender stems and leaves, while others, such as kohlrabi, are also grown for their tasty, turnip-like tubers.
As such, there’s no fixed time to harvest these plants, and growing periods can range from as little as 3-weeks after transplanting to more than 80 days. Be sure to check your seed packet for the specifics, depending on your plant.
2. How to grow Chinese spinach
Use this guide for growing:
- Malabar spinach
- Red amaranth
- Water spinach
- Edible amaranth
- Chinese spinach
While Chinese spinach is a plant in its own right — Amaranthus dubius — the name has come to refer to several other plants as well. Most of these are distantly related to ordinary spinach and typically belong to the same plant family: Amaranthaceae. 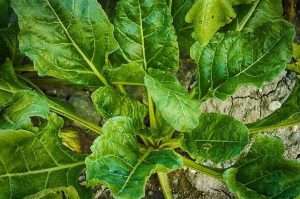
Let’s take a look at the ideal growing conditions for these tasty Asian leafy vegetables.
– Germination
Chinese spinach type plants are relatively low maintenance. The easiest method is to germinate them indoors rather than planting them directly outside, especially if you’re not living in a tropical region. For the most part, simply fill a compostable seedling pot with compost and plant a single seed in each. Spray with plenty of water at least once a day and keep them warm — Chinese spinach is a warm-season crop.
Depending on the specific type of Asian spinach you’re growing, you can expect the seeds to germinate within 10 to 30 days. You don’t usually need to soak your Chinese spinach seeds before sowing, though varieties such as water spinach need to be soaked for 24 hours before planting.
– Temperature and when to plant outside
As a warm-season crop, temperatures mustn’t drop below 70°F (21°C) after planting. Make sure your Chinese spinach seedlings are only transplanted after they have two sets of leaves each.
– Location
Most Chinese spinach varieties thrive in sunshine and need at least 6 hours of direct sun each day. Plant spacing varies drastically from species to species, ranging from around 3 inches (8 cm) between crops up to more than 1 foot (30 cm). Additionally, you may need to provide support for varieties such as Malabar spinach. You can either set up a trellis or grow alongside a fence.
– Soil
Chinese spinach plants aren’t typically fussy about the soil they’re planted in, as long as it’s well-draining, with a pH between 5.5 and 7.0. A nutrient-rich substrate will encourage healthy growth, though, for the most part, you won’t need to apply fertilizer regularly.
Topping the soil with mulch is a good idea and will assist with keeping the soil moist.
– Watering
Chinese spinach plants generally enjoy quite a lot of water, though Amaranth species are quite hardy and can handle short periods of drought.
For the most part, however, be sure to keep the first few inches of soil moist and keep an eye on it during scorching days, as it may lose moisture due to evaporation.
– Fertilizer
Your Chinese spinach plants will typically be okay without fertilizer, especially if they’re planted in a mix of soil and compost. However, if they seem to be struggling, you can add a liquid nitrogen fertilizer once a month.
– Harvesting
Many varieties of Chinese spinach are reasonably fast growers, especially in warm weather with plenty of water. Chinese spinach proper (Amaranthus dubius) is among the quickest and is typically ready to harvest around 30 days after sowing.
However, some Amaranths can take up to 3 months before they’re willing to harvest, especially those grown for their grain.
The vast majority of Chinese spinach plants will continue to produce leaves when you use the cut-and-come-again method. In this way, simply cut off the young leaves you want to use, and the main plant will continue producing new ones.
3. How to grow Asian beans, peas, and soy
Use this guide for growing:
- Edamame
- Dou miao
- Yardlong beans
- Hyacinth beans
- Winged beans
- Azuki bean
- Guar
There’s a wide range of Asian beans and peas to choose from, each sharing similarities with their western counterparts but with a unique taste. Growing them isn’t too tricky, though there are a few things to take into account.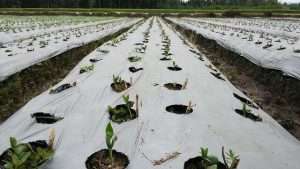
Let’s take a look.
– Germination
Many Asian peas and beans will be okay if you sow them directly outside, but you can save time by germinating them inside like a warm-season crop.
Our recommendation is to start them off in compostable seed pots. Simply fill the pots with gardening soil mix and poke a hole about half a finger deep in the center. Add in the seed, cover with soil and water lightly using a spray bottle, then keep in a room where temperatures are around 70°F (21°C). Avoid over-watering the seeds, as they can be sensitive to too much water.
Germination will typically take approximately 1 to 2 weeks.
– Temperature and when to plant outside
Asian peas, soy, and beans are sensitive to very low temperatures, so ensure all chances of frost have passed before planting outside. Once your seedlings have at least 4 leaves each, they’re ready to be transplanted.
They will thrive in warmer temperatures, so wait until late spring to plant them outside for the best results. Generally, temperatures between 80°F and 90°F (27°C to 32°C) are ideal.
– Soil
Rich, well-draining loamy soils are ideal for Asian beans and peas, but if the soil in your garden is clay-heavy, you can also add amendments such as a bar or peat moss. Asian legumes favor slightly acidic soil, but a pH ranging from 5.5 to 7.5 will work in most cases.
Before transplanting, be sure to aerate your soil using a mini tiller or a garden fork.
– Location
Asian legumes need the right amount of sun and can handle direct sunlight without a problem, so try to plant them somewhere they can get at least 6 hours of sunshine throughout the day. Be sure to give your beans and peas plenty of space to grow and sow them at least 1 foot (30cm) apart.
Many Asian beans and peas love to climb and can reach dizzying heights. As such, you’ll need to set up a trellis to provide support. Some varieties, such as edamame beans, won’t require a trellis, whereas yardlong beans will require up to 7 feet (2.1 meters) of support.
– Watering
Water your Asian legumes regularly, and pay close attention to the soil moisture during the following 3 key stages: after transplanting, when they start flowering, and when the pods begin to mature.
The best practice is to water them once the top inch of soil is dry. This can vary from daily to once a week, depending on the conditions in your garden. Avoid overwatering your Asian legumes, as this can lead to root rot.
– Fertilizer
Like all legumes, Asian beans and peas fix nitrogen in the soil. As long as they have been sown in a substrate rich in nutrients and nitrogen, they will not need additional fertilizer applications once the plants are established.
– Harvesting
Asian legumes take quite a bit of time before they can be harvested. In general, the growth period can take anywhere from 70 to 150 days, but dwarf bean varieties can reach maturity as early as 50 days.
You can tell that most Asian peas and beans are ready to harvest when the seed pods are vibrant green and firm to the touch, but not hard. Once the pods start to turn yellow, they will typically still be okay but a bit more starchy. However, if you see that the leaves are beginning to fall from the vines and you still haven’t harvested your beans or peas, you might have left them too late.
4. How to grow Asian cucumbers, gourds, melons, and squash
Use this guide for growing:
- Tinda / Indian squash
- Japanese squash / Kabocha
- Bitter melon
- Snake gourd
- Winter melon
- Bottle gourd / Calabash
- Edible luffa
- Angled luffa
- Hairy gourd / Mo Qwa
- Korean melon
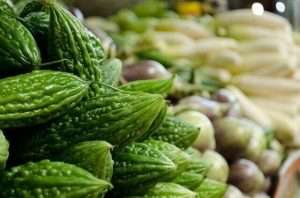 There are many varieties of Asian gourds, melons, and squash, varying in appearance and taste. They are part of the Cucurbitaceae family, which incorporates many familiar veggies, such as zucchini, pumpkin, cucumbers, and luffa. Despite their different appearances, they usually require similar growing conditions.
Let’s take a look at the basics.
– Germination
The majority of Asian gourds are warm-season plants, and while you can sow the seeds outside, we’d recommend germinating them inside. Not only does this ensure your seedlings will be at the right temperature, but it also means you can plant them earlier in the year.
Asian gourd seeds tend to be relatively thick and therefore benefit from soaking before planting them. Depending on the species, you can soak them for between 6 and 24 hours, though always check the instructions on your seed pack. Next, plant them in individual compostable seed pots and cover them with gardening soil mix.
Most Asian gourd seeds will sprout best in soil temperatures of at least 68°F (20°C), though some of the more tropical plants, such as snake gourd, need temperatures of around 80°F (27°C). Water them well, but don’t overdo it, or you risk drowning them. Keep them in a warm, sunny place, and you would see the seedlings sprout in about 10 to 14 days.
– Temperature and when to plant outside
There’s no set temperature range for growing Asian gourds, as they originate from a vast area that includes tropical regions and temperate ones alike. However, the majority of Asian gourds are warm-season crops. Those in temperate climates should aim to transplant them in late spring when temperatures won’t drop below 68°F (20°C).
When it comes to Asian gourds, warmer temperatures are preferable, with 77°F to 95°F (25°C to 35°C) being the ideal range. If you live in a cooler climate, you can quickly grow Asian gourds in a greenhouse and even in containers.
– Soil
Well-draining, nutrient-rich soil is excellent for most Asian gourds, with a pH ranging from 5.5 to 6.5. It’s good to mix some compost into your soil before planting and incorporate soil amendments such as bark or peat moss in heavier soils.
For the most part, it’s a balancing act of soil that will drain any excess water but retains moisture long enough in warm weather for the plant to use it.
– Location
Asian gourds come in all shapes and sizes, so spacing and location will differ from plant to plant. The climbing bitter melon will need a trellis of around 16 feet (5 meters) to support it, while others can spread across the ground on a layer of straw or plastic tarp. Be sure to check the requirements for your specific crop.
Most Asian gourds will enjoy at least 6 hours of sunshine a day, so pick a sunny spot in your garden for them.
– Watering
Aim to water your gourds regularly. A delicate balance is necessary, so avoid letting the soil dry out and waterlogging the plants.
A good tip for growing Asian gourds is to add a layer of mulch to the base of the plants. This will help retain the moisture in the soil, especially in sweltering weather.
– Fertilizer
If you mix compost in with your soil before planting your Asian gourds, you won’t need to worry about using fertilizer.
In some cases, a monthly liquid fertilizer application can encourage healthy growth, but avoid nitrogen-rich fertilizers, as they will encourage the plant to produce more leaves rather than flowers and fruit.
– Pruning
With Asian gourds, it’s essential to encourage the plant to spend more energy on producing flowers and fruit. However, regular maintenance and pruning are required.
You can start pruning your Asian gourds when the first female flowers make an appearance. Cut back the topmost vines and, in case of climbing gourds, the ones that are close to the ground.
– Pollination
Pollination is essential for fruit production in all Asian gourds. Fortunately, nature will typically care for it when planted outside. However, if you’re growing your gourds inside or in a greenhouse, you’ll need to pollinate them manually.
This is simply a case of cutting the male flowers from the vine and tapping the pollen onto the female flower. Try to do this early in the day when the plants are most active.
– Harvesting
There are no hard and fast rules for harvesting Asian gourds, given the fact that there are so many different types. For example, snake gourd or bitter melon are typically picked when they are immature, and the flesh is crispy and not fibrous.
On the other hand, kabocha squash should be allowed to ripen on the vine before it can be harvested. Always check the specifications on your seed packet for the best harvesting times.
5. How to grow Asian herbs
Use this guide for growing:
- Thai basil
- Shiso / Perilla
- Okahijiki
- Chinese chives / Bunching onions
Asian herbs offer a whole new range of tastes and flavors that can take your Asian dishes to a whole new level. For the most part, they’re easy to grow at home and are excellent choices to grow indoors for easy pickings as and when you need them. 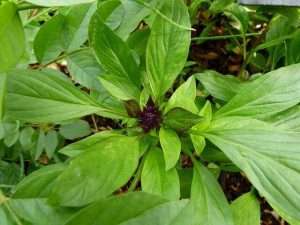
Here are the basics.
– Germination
Before sowing your Asian herb seeds, we recommend soaking them for 24 hours. The best method is spreading the seeds between two layers of kitchen roll and using a hand spray pump to moisten the tissue. Keep the paper towels damp in a room where the temperature is between 60°F and 75°F (15°C to 24°C).
After 24 hours, sow the soaked seeds in compostable seedling trays filled with potting soil mix. The seeds are tiny, so don’t bury them too deep. Sprinkle some soil on top and water using a spray pump. They will take between 7 and 14 days to germinate, although Chinese chives can sprout as early as 3 days after sowing. Seedlings can be transplanted when they have two sets of leaves each.
– Temperature and when to plant outside
Asian herbs require warm temperatures for optimal growth. Their ideal temperature range is between 60°F and 75°F (15°C to 24°C), so only plant outdoors when it is warm enough.
– Soil
Asian herbs prefer soils that are nutrient-rich, moist but well-draining, and slightly acidic, with a pH ranging between 5.5 and 6.5.
Before sowing them in your garden, prepare the soil by incorporating compost into the substrate and provide soil amendments such as vermiculite, bark, or peat moss if you have clay-heavy soils.
– Location
Plant your Asian herbs in a part of your garden that receives at least 6 hours of sunlight per day. Space them out around 8 to 12 inches (20 to 30) cm apart, in rows at least 1 foot (30 cm) apart. Water regularly in the first week after transplanting to ensure that the plants have settled.
Asian herbs are an excellent choice for container growth. They are often harvested when young, so a container that’s at least 6 inches (15 cm) deep should be sufficient to accommodate their root system. If you want to grow Asian herbs indoors, you can sow them directly in the pots without getting them started in seedling trays.
– Watering
Once they become established in your garden, Asian herbs can tolerate mild drought. For optimal growth, we recommend deep, weekly watering, which should be done at the plant’s base, not sprayed on the leaves. You can also add mulch at the plants’ bottom to preserve the moisture in the soil during hot, dry periods.
– Fertilizer
Apply liquid organic fertilizer once every 4 weeks, ideally a fish emulsion fertilizer.
– Harvesting
All Asian herbs are best harvested when young when the leaves are tender and very aromatic. You can harvest them as early as 4 weeks, although it’s often best to wait until the plants are around 6 inches (15 cm) tall. Use the cut-and-come-again method to pick the stems and leaves you wish to consume. This technique essentially works the same way as pruning, so the more you harvest your Asian herbs, the more new leaves and stems they will produce.
In general, the flavor and texture of Asian herbs start to fade when they begin flowering.
Although flowers are edible, we recommend snipping them off before they get a chance to bloom. This will encourage the herbs to spend more energy in producing new leaves, which extends their lifespan.
6. How to grow Asian root vegetables
Use this guide for growing:
- Watermelon radish
- Gobo root / Burdock
- Kuroda carrots
- Daikon radish
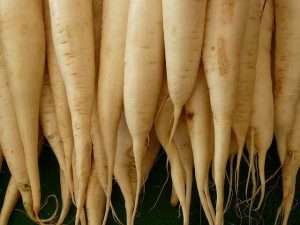 Asian root vegetables aren’t too dissimilar to their western counterparts, and most benefit from similar growing conditions. However, they can offer something slightly different, such as the stunning natural colors of the iconic watermelon radish, and brighten up various dishes.
Let’s take a closer look.
– Germination
All root vegetables should be planted directly in the soil — the same applies to Asian varieties. The reason for this is that transplanting them can cause the thin, tender roots to become twisted when reinserted in the soil, leading to bent and deformed vegetables later on. Radishes are the first to germinate, and you will start seeing seedlings as early as 5 days. Gobo root and carrots take a bit longer, usually between 7 and 14 days.
– Temperature and when to plant outside
Asian root vegetables prefer cooler growing conditions and can be sown directly in your garden once any chance of frost has passed. The ideal soil temperature for sowing is around 59°F (15°C).
– Soil
All root vegetables need to be grown in a rich, neutral, slightly sandy, and well-draining soil. A pH ranging from 6.0 to 6.8 is ideal for carrots, although radishes prefer a higher pH of up to 7.5.
When preparing the soil, make sure to remove any rocks and other debris, as they will cause the roots to grow deformed. Loosening the soil with a bit of sand will also make harvesting easier: if it’s too compacted, you risk snapping off the leaves and having to dig out the vegetables.
– Location
Plant your Asian root vegetables in a part of the garden where they get at least 6 hours of full sun daily. Their seeds are tiny, so don’t plant too deep; a depth of ½ inch (1.3 cm) is more than enough. Sow around 6 inches (15 cm) apart, in rows separated by at least 2 feet (60 cm). Watermelon radishes are small enough to plant 2 inches (5 cm) apart, but the rule of thumb for root vegetables is that spacing allows for healthy root growth.
– Watering
Provide your Asian root vegetables with regular watering to ensure healthy growth. Watering should be done at the root level, not on top of the leaves. Keep the soil moist but not soggy, as this can cause root rot, which will destroy your entire crop.
– Fertilizer
Apply a liquid, slow-release fertilizer once a month. A ratio of 10-10-10 is ideal for Asian root vegetables, as too much nitrogen can cause forking in the roots, especially in carrots.
– Harvesting
The harvesting schedule for Asian root vegetables varies depending on the plant. On average, radishes can be picked as early as 60 days. Allow 80 to 90 days for carrots. Both can easily be harvested by hand, by pulling them from the soil.
Gobo root is typically harvested in the autumn of the first year it’s been sown, and you will need a shovel to dig it out. You can also harvest it as early as 3 months after sowing, although the roots will only be a few inches long.
7. How to grow Asian nightshades
Use this guide for growing:
- Tomatoes / Momotaro tomato
- Chinese eggplant
- Indian eggplant
- Japanese eggplant
- Korean eggplant
- Filipino eggplant
- Thai eggplant
- White eggplant
- Oriental sweet peppers
- Chi chien pepper
- Korean long green pepper
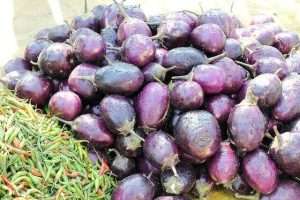 Nightshade is a catch-all name often used to refer to plants and vegetables in the Solanaceae family. Despite its name, which doesn’t sound very appetizing, the nightshade family includes some of the tastiest Asian veggies, such as eggplants, tomatoes, and peppers. The clue for growing them is in the name: in Latin, ‘solis’ mean sun, and that’s what these plants love: plenty of light and warmth.
Here’s what you will need.
– Germination
Nightshades are very sensitive to cold, which is why we recommend starting them indoors, in compostable seed trays. You don’t need to soak the seeds before sowing. Fill each pot with a gardening soil mix, place one seed in each pot, and sprinkle some soil on top.
Water regularly and keep in a room where the temperature is around 70°F (21°C).
Germination occurs after 2 to 3 weeks, and seedlings are ready to transplant when each plant has two sets of leaves.
– Temperature and when to plant outside
The optimum temperature range for nightshades is between 70°F and 86°F (21°C to 30°C). Plant them outside when the soil temperature consistently stays above 50°F (10°C), ideally in mid-spring. Anything below that and the cold can kill the delicate seedlings.
– Soil
Plant your nightshades in a light, nutrient-rich, loamy, aerated, and very well-draining soil.
The ideal pH range is between 6.0 and 7.0, although peppers will grow in soils with a pH of up to 7.5. Use compost or manure to increase the nutrients in the substrate and a soil amendment for dense, clay-heavy soils. Nightshades do not tolerate boggy soils, which can cause root rot.
– Location
Pick a part of your garden where your plants can receive around 6 to 8 hours of direct sunlight each day. Don’t let the name fool you: nightshades are sun-loving plants and will grow poorly in partial shade.
Space the plants around 12 to 18 inches apart (30 to 46 cm) in rows at least 2 feet (60 cm) apart. Varieties of eggplants and tomatoes that grow taller than 3 feet (90 cm) might need staking, especially during the fruiting season. We recommend staking them sooner to avoid damaging the roots later on.
Nightshades are perfect for growing in containers, especially if you have a balcony in your home. We recommend 10 gallons (37 liter) pots and one plant per container when transplanting to a container.
– Watering
Watering your nightshades can be a balancing act: too little water and they will wilt; too much water, and they can develop verticillium wilt, or produce fruit that is blistered and spotty.
Our recommendation is to give your nightshades little and frequent waterings. Peppers and tomatoes typically need more water than eggplants, and during hot, dry periods, daily watering will be necessary. Water your plants early in the morning or in the evening to avoid shocking them. Add mulch to the base of the plants to encourage soil moisture retention.
– Fertilizer
Apply a liquid, slow-release, low nitrogen, organic fertilizer when you notice that your nightshades have started flowering. A ratio of 5-10-10 (nitrogen-phosphorus-potassium) is best, as this will stimulate healthy growth and an abundant fruit harvest. Continue applying the fertilizer once every 3 to 4 weeks until the beginning of autumn, or when the plants stop flowering.
– Harvesting
Most nightshades take between 50 and 70 days after sowing to reach maturity. Very hot peppers typically need longer, so expect around 90 – 100 days from potting for them to mature.
Tomatoes and peppers are easy to spot when they’re ready for harvesting due to their vivid, red, or orange color. Simply cut the stems with a pair of gardening scissors and enjoy. For eggplants, especially the Thai varieties that are green even when ripe, pick the fruits when they’re firm but not hard to the touch, producing a dull sound when tapped.