

- When to Plant Corn in San Diego: Optimal Seasons and Tips - July 19, 2024
- When to Plant Hydrangeas in Illinois: Best Timing for Optimal Growth - July 19, 2024
- Why Are My Radishes Growing Above Ground: Uncovering the Causes - July 19, 2024
As a seasoned gardener, I’ve come to appreciate marigolds for their vibrant gold and orange hues that bring life to my summer garden. These flowers are not only easy to grow, but they are also long-blooming, ensuring a burst of color throughout the season. My experience aligns with the well-known fact that marigolds are remarkably low-maintenance, which makes them a favorite among novice and expert gardeners alike.
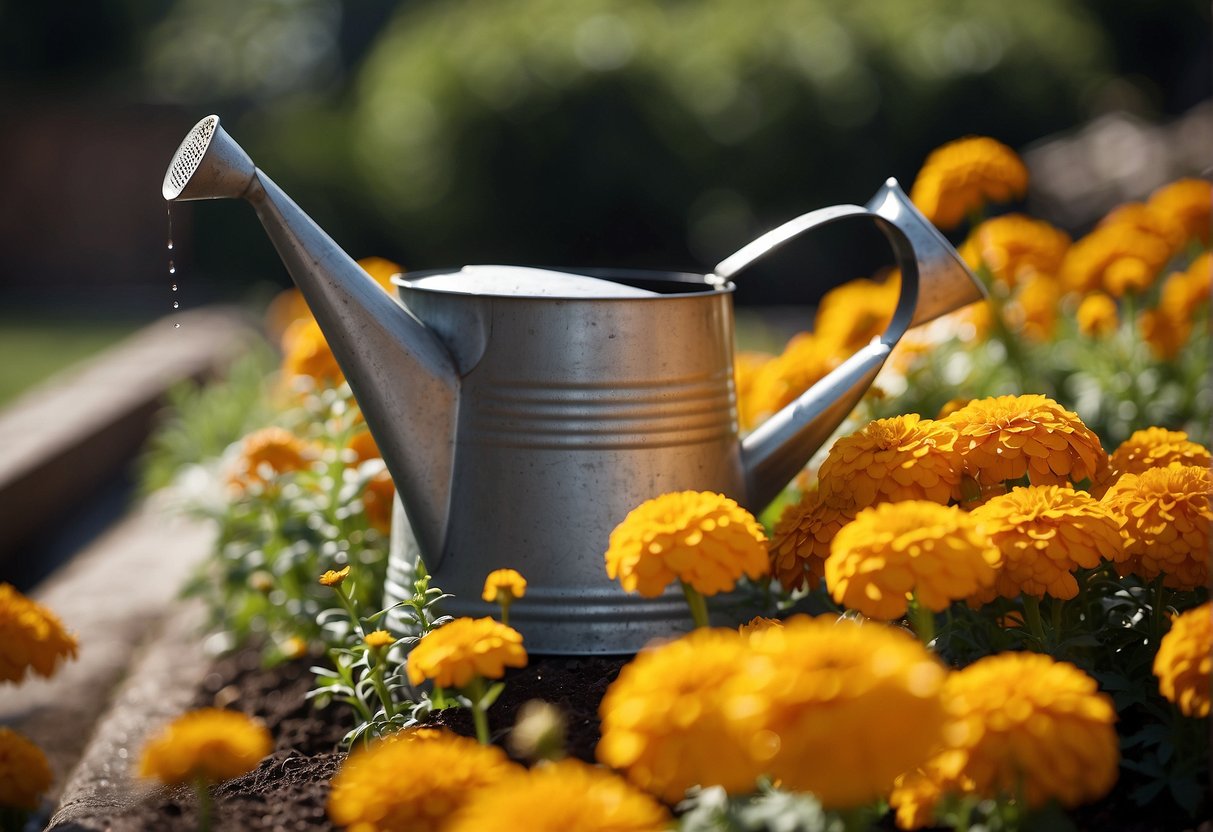
I understand the importance of consistent watering for these plants. Early on, I learned that marigolds require the right balance of moisture to establish a strong rooting system soon after planting. Keeping the soil sufficiently moist during the first few weeks is crucial. Thereafter, the watering frequency for marigolds adjusts as the plants become more established. Regular checks on soil moisture guide me in determining when it’s time to water again, ensuring the plants remain robust and healthy.
JUMP TO TOPIC
Choosing the Right Soil and Containers for Marigolds
In my experience, ensuring marigolds flourish starts with selecting the proper soil and containers. A good foundation is as important as the care they receive afterwards.
Understanding Soil Requirements for Optimal Growth
Marigolds require well-drained soil that is fertile to flower abundantly. I’ve found that a mix of loamy soil amended with compost or other organic matter provides the nutrients these flowers crave for vibrant growth. It’s crucial to avoid heavy, water-logged soils that can cause root rot. Instead, aim for a balanced, neutral to slightly acidic pH level; a pH of 6.0 to 7.0 is ideal.
For marigolds, I prefer a blend of two parts loam, one part peat moss, and one part sand. This mixture ensures good drainage while retaining enough moisture and nutrients.
Selecting Containers and Drainage Considerations
The right container is just as crucial as the correct soil. I always opt for pots with drainage holes to keep excess water from pooling at the bottom. While marigolds are adaptable and can grow in a variety of container sizes, they do best when not overcrowded. A pot size that’s too small will restrict their root development, so I ensure that the container is at least 8 to 12 inches wide and deep. Raised beds are another great option for growing marigolds if you’re looking to make a more permanent planting.
💥 Pot Selection Key Points
- Avoid containers without drainage holes to prevent waterlogging.
- Choose pots that give your marigolds room to grow – 8 to 12 inches in size typically works well.
- Consider raised beds for a more permanent solution and enhanced soil drainage.
Watering Techniques and Schedules for Healthy Marigolds
To maintain vibrant marigolds, I adhere to a tailored watering regimen that adjusts for plant maturity, seasonal variations, and signs of over or underwatering.
Balancing Moisture Levels to Prevent Root Rot
Adapting Watering Needs to Seasonal Changes
With the onset of hot weather, marigolds’ watering needs increase due to faster evaporation rates. During these times, I increase watering but remain vigilant for signs of overwatering, such as wilted leaves, which can be misleading. Conversely, in cooler seasons, I reduce watering frequency to combat damp conditions that can foster fungal diseases.
Determining the Right Watering Frequency
Maintaining Marigolds Through Seasonal Weather Changes
Marigolds are resilient, but their vibrancy and health can be significantly affected by seasonal weather patterns. Understanding and adjusting watering and care routines in response to changing climates is essential for maintaining cheerful marigold blooms throughout the year.
Protecting Marigolds from Climate Extremes
To protect marigolds from extreme weather variations, I use mulch to regulate soil temperature and moisture. During unexpected cold snaps, I cover them with frost cloths, especially in early spring or late autumn to shield them from frost damage. In peak summer, providing shade can prevent wilting and drought stress.
Transitioning Marigolds from Summer to Autumn
Adapting care routines as the climate cools from summer to autumn is crucial for marigold maintenance. I decrease watering frequency as the weather cools to prevent waterlogging and potential fungal growth. Before the arrival of winter, I ensure to prune any spent blooms to encourage additional flowering and prepare the plants for colder weather conditions.
Caring for Marigolds During Hot and Dry Climates
In hot and dry climates, I water my marigolds in the early morning or late evening to minimize evaporation. Soaking the soil deeply, at least once a week, promotes a strong root system better equipped to withstand heat. However, during extended periods of intense heat, I will water more frequently, while always being cautious to avoid wetting the foliage to reduce leaf scorch.
Encouraging Vibrant and Continuous Blooming
To promote a continuous display of vibrant marigold blooms, specific care practices need to be followed. It’s about balancing the right amount of water, light, and nutrients while warding off diseases and timely deadheading.
Achieving Healthy Flowering and Foliage
For marigolds to blossom with the intense red, yellow, and orange colors they’re famous for, they require full sun and careful watering. I ensure their soil is kept moist, especially for the first few weeks after planting, to establish a strong root system. Once established, I reduce watering to once a week, making adjustments based on weather conditions.
Marigold foliage should appear bushy and vibrant green. If the leaves become paler, it may be a sign to reassess watering practices or to introduce a balanced fertilizer to boost plant vigor.
Managing Disease to Promote Upright Growth
Keeping marigolds upright and healthy is key to showcasing their carnation-like blooms. To prevent disease, I plant marigolds in well-draining soil and space them properly, allowing for adequate air circulation. This prevents moisture-related diseases, which can lead to drooping leaves.
💥 Quick Disease Prevention
I avoid wetting the foliage when watering, targeting the base of the plant to minimize splash-back, which can spread soil-borne pathogens.
Strategies for Deadheading and Pruning
Regular deadheading encourages marigolds to direct energy into producing new blooms. I use clean shears to remove spent flowers every few days, which helps my marigolds maintain a neat appearance and stimulates further blooming.
Pruning is equally important for marigold care. I prune my marigolds periodically to promote a bushier and more elegant growth habit, ensuring they serve as eye-catching borders and companion plants throughout the growing season.
- Cut off the spent flower head at the next stem junction.
- Prune any excess or dead foliage to maintain shape.
- Dispose of removed flowers and leaves to keep garden beds tidy and pest-free.


