

Garden hoses are essential tools in maintaining a thriving garden, but they aren’t immune to damage. Whether it’s a simple puncture or a leaky connector, a damaged hose can be a source of frustration. I know how important it is to have a functioning hose, hence fixing it quickly becomes a priority. The good news is that repairing a garden hose is often a simple task that requires just a few tools and can be completed in no time.
From personal experience, a simple splice repair or replacing a worn gasket can save the day and extend your hose’s life.
When I find a leak, the first step I take is to assess the extent of the damage. Small leaks can be sealed with waterproof tape or rubber cement, giving a quick and effective fix. For more severe damage, such as a burst section or faulty fittings, I use hose repair kits. These kits typically include a replacement end or a mender that can be easily installed. Achieving a watertight seal is crucial, so I ensure to follow each step carefully to avoid further issues.
JUMP TO TOPIC
Identifying Common Hose Issues
In my experience maintaining gardens, recognizing problems with garden hoses is crucial to efficient garden management. Let’s discuss how to spot leaks and handle a burst hose.
Small Leaks and How to Spot Them
Small leaks are the most frequent nuisances I encounter with garden hoses. They can occur anywhere along the hose and are often due to wear and tear or physical damage. When I check for leaks, I look for any signs of water seeping from the hose, including small wet spots on the ground or a misty spray when the water is on. Pinpointing a leak is straightforward—I turn on the water and follow the hose length until I find where water is escaping.
To accurately identify the size of a leak, I measure the hole’s diameter when possible. If the hose is leaking due to a loose connection, the issue is often at the spigot or nozzle. A leaky hose can waste water and reduce water pressure, affecting the overall hose performance.
For a quick fix of small leaks, I usually apply waterproof tape or a hose repair kit specifically designed for such issues. These methods are practical for holes less than 1/4 inch in diameter.
Dealing With A Burst Hose
A burst hose is a more challenging problem. This occurs when a large damaged section can’t contain the water pressure, leading to a rupture. I always check my hoses regularly for signs of weakness or bulging that may indicate a risk of bursting.
When a hose bursts, the damaged section will usually have a significant tear or split. My approach is to assess the damage—if it’s too extensive, I might have to replace the entire hose. However, if the hose has burst at a single point, it can often be repaired by removing the damaged section and installing a hose mender.
💥 Tip: Preventing a burst hose starts with proper maintenance, including regular inspection, correct storage during off-seasons, and avoiding excessive pressure when in use.
Essential Repair Tools and Materials
When repairing a garden hose, specific tools and materials are necessary to ensure a clean, durable fix. Using the right equipment can mean the difference between a temporary patch and a hose that lasts for many more seasons.
Choosing the Right Hose Clamps and Washers
Hose clamps are vital for securing the ends of the hose around repair couplings or menders. I recommend using stainless steel clamps for their durability and resistance to rust. When working with clamps, make sure they match the size of your hose—clamps that are too large won’t provide a secure fit, while ones that are too small won’t fit at all.
For washers, rubber washers are the go-to choice as they create a tight seal and help prevent leaks. It’s crucial to check if the washer fits snugly within the hose coupling to ensure no water escapes. Oftentimes, simply replacing a worn gasket or washer can stop a hose leak.
Washers: Opt for rubber washers for a better seal.
Utility Knife and Pliers: When to Use Them
A sharp utility knife is indispensable for cutting away damaged sections of the hose. Clean cuts are important to create smooth surfaces that fit well with repair fittings. Always cut perpendicularly to the hose to avoid angled edges that could cause improper sealing.
Needle-nose pliers, on the other hand, are useful for removing old clamps and fittings. They provide the precision needed to grip small parts without causing damage to the remaining hose. In some cases, when working with a compression mender, pliers can be used to ensure a secure compression fit.
💥 Tip: Use a utility knife for cutting the hose, and pliers for working with clamps and fittings.
Step-by-Step Guide to Hose Repair
When your garden hose starts leaking, it doesn’t necessarily mean it’s time for a new one. Armed with a few simple tools and materials, I can show you how to fix common issues such as punctures or damaged fittings to extend the life of your hose.
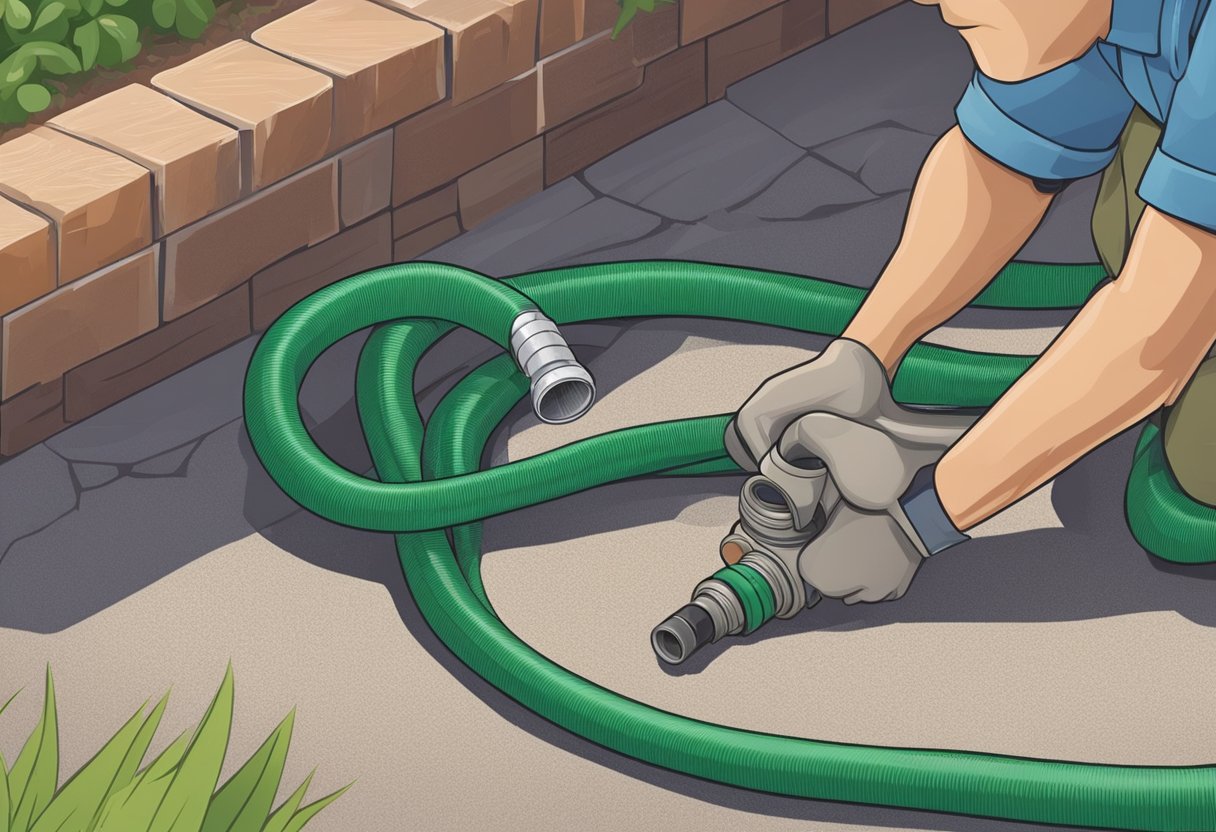
Fixing a Garden Hose with a Hose Mender
When I notice a leak in the middle of my garden hose, a hose mender is my go-to solution to mend the damage. Here’s what I do:
- Cut out the damaged section of the hose using sharp scissors or a hose cutter.
- Choose a hose mender that matches the diameter of my garden hose.
- Insert the barbed end of the mender into each cut end of the hose.
- Secure the mender with the provided clamp or screws.
The key is to make sure the cuts are straight and the clamp is tight, so there’s no leakage when I turn the water back on.
Replacing Damaged Fittings and Couplings
Damaged or bent fittings, particularly at the faucet end or spray nozzle, can cause leaks and impede water flow. To replace a damaged coupling, I follow these steps:
- Remove the damaged fittings by cutting off the hose end if it’s crimped on, or by unscrewing if it’s a screw-on type.
- Inspect and replace rubber washers if they are worn out, to ensure a tight seal.
- Attach the new coupling by pushing the hose end over the barbed end of the coupling.
- Tighten with a hose clamp to secure it in place.
For screw-on types, I ensure the threads align properly to prevent cross-threading which can damage the new fitting. After replacing, a quick test run assures me the new coupling is effectively stopping any leaks and my hose is ready for action again.
Maintaining Your Garden Hose
Effective maintenance of a garden hose involves protection from damage and proper storage.
Preventing Future Leaks and Tears
Additionally, make it a habit to inspect the hose regularly for any small holes or beginnings of tears. Small issues can sometimes be fixed on the spot with simple methods, such as a rubber patch or hose mender from the hardware store, rather than leaving them to become bigger problems.
Storing Hoses: Tips for Extending Hose Life
💥 Proper Hose Storage
Before winter arrives, it’s crucial to drain all water from the hose to prevent freezing and cracking. Once drained, detach from the outdoor faucet and store indoors to safeguard against cold temperatures. This practice not only preserves the material but also keeps connections at the male and female ends from seizing up.


