

Victory gardens, originally born out of necessity during World Wars I and II, have seen a resurgence in various forms as a means of bolstering food security. Conceived as a response to food supply pressures, these personal or community plots contributed significantly to national food production. Influenced by history and rekindled by events like the COVID-19 pandemic, I find the concept of victory gardens to be just as relevant today, offering self-sufficiency and a sense of empowerment.
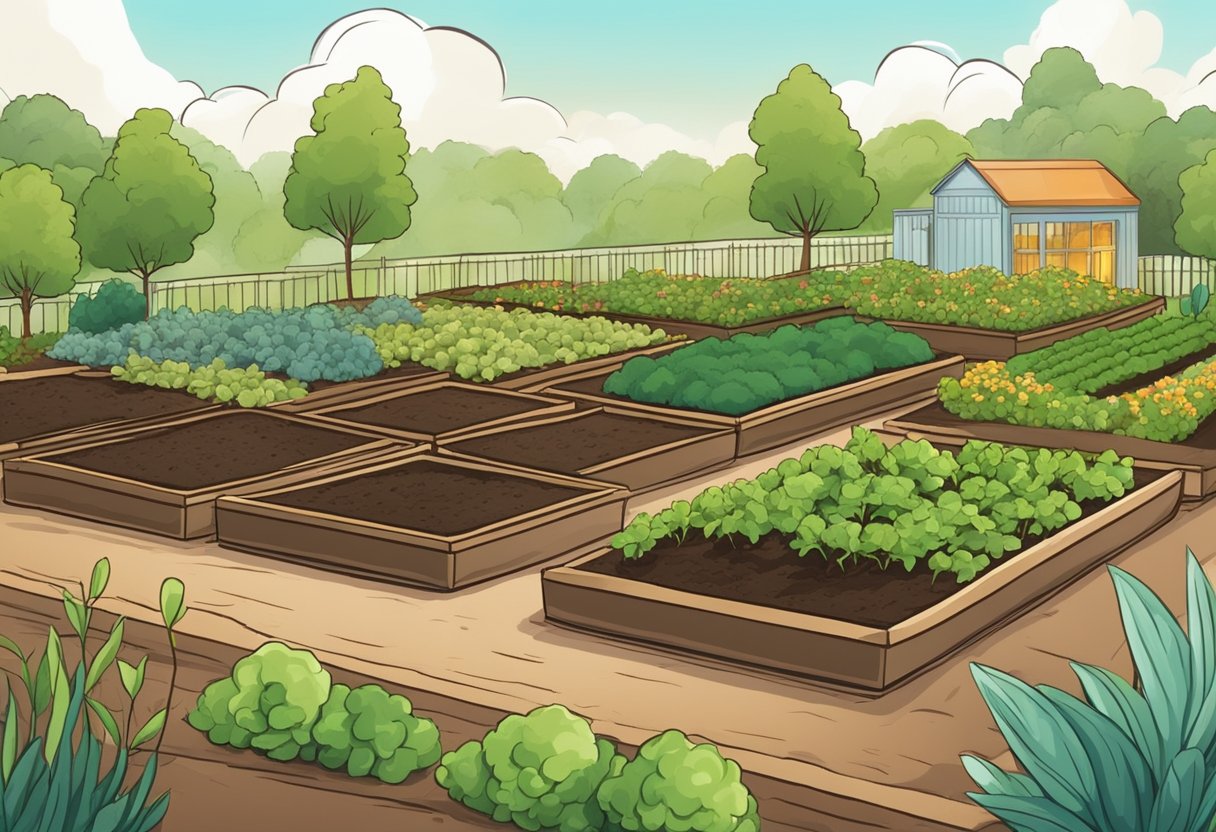
Starting a victory garden requires consideration of a few key factors. It should ideally be in a location that receives ample sunlight—about 6 to 8 hours per day—and be situated away from any large trees or structures that could cast shade. Monitoring your intended plot throughout a day can help you verify that you’ve chosen an optimal spot. Beyond location, soil quality, and understanding what to plant are critical. Traditional victory gardens included nutrient-rich vegetables such as beans, carrots, and peas, which are just as important for today’s gardeners.
JUMP TO TOPIC
Planning and Starting Your Victory Garden
Growing your own victory garden starts with careful planning and preparation. Identifying the right location, choosing the appropriate seeds and plants, and deciding whether to use containers or raised beds are pivotal steps in this process.
Choosing the Right Location and Soil
When selecting a location for my victory garden, I ensure it receives adequate sunlight—ideally six to eight hours a day. A soil test is imperative to determine nutrient deficiencies and pH levels, tailoring my soil amendment approach accordingly. The site must also allow for efficient watering without waterlogging plants.
💥 Key Considerations for Location and Soil:
– Soil test results: guide amendments for optimal plant health
– Proximity to water source: for consistent watering without excess
Selecting Seeds and Plants for Your Garden
I focus on selecting a mix of seeds and starter plants that will thrive in my garden’s conditions. Vegetables like beans, tomatoes, peas, cucumber, kale, and beets are all excellent choices. I pay special attention to the maturity time and spacing requirements to ensure a bountiful harvest.
💥 Popular Victory Garden Plants:
- Beans: Productive and easy to grow, requiring poles for climbing varieties.
- Tomatoes: Need support and are best grown in warm conditions.
- Peas: Enjoy cooler temperatures and can climb supports or trellises.
- Cucumber: Require space to spread; consider trellising to save space.
- Kale: Hardy and nutrient-rich, thriving in both warm and cool weather.
- Beets: Easy to grow, preferring cooler temperatures and sweetening with frost.
Utilizing Containers and Raised Beds
Raised beds and containers have become my go-to for their excellent drainage and ability to fill with rich soil. These options are ideal if the native soil is poor or space is limited. Containers are particularly helpful for controlling soil quality and moving plants to optimize exposure to sunlight.
💥 Advantages of Raised Beds and Containers:
| Benefits of Raised Beds | Benefits of Containers |
|---|---|
| Better soil drainage | Portability to optimize sunlight |
| Reduced soil compaction | Control over soil mix |
| Ease of access and maintenance | Can be used in limited spaces |
Maintaining a Healthy Garden
To ensure a thriving victory garden, a combination of adequate water, nutrients, and defense against pests and disease is key.
Water, Nutrients, and Sun Exposure
Victory gardens need consistent watering, especially at the initial stages of plant growth. Once established, aim to provide about an inch of water per week, whether through rain or irrigation.
Nutrient management is crucial. I enrich the soil with organic matter and compost, which slowly release nutrients and enhance soil structure. Sun exposure is another critical factor. Most vegetables require 6 to 8 hours of direct sunlight to flourish. I monitor sunlight patterns to confirm my garden is optimally placed.
Disease and Pest Management
In my experience, healthy plants resist pests and disease better, so I prioritize plant health through proper spacing for air circulation and by using organic fertilizers. If pests or diseases do appear, I identify and treat them early, using treatments that are effective yet gentle on the environment.
Weeding and Composting
Regular weeding keeps my garden tidy and prevents nutrient competition. I use mulches to suppress weed growth. Additionally, I make compost from garden and kitchen waste. This not only recycles nutrients but also improves soil structure, making it less inviting for weeds to establish.
Composting tips and benefits:
Compost improves soil water retention and nutrient profile.
Harvesting and Utilizing Your Produce
Harvesting your victory garden at peak ripeness is crucial to savoring the best flavors and maximum nutrition. Let’s explore the steps to proper harvesting, preservation, and community sharing of your fresh produce.
Tips for Harvesting Vegetables at Peak Ripeness
I time my harvesting to ensure that vegetables are at their most flavorful and nutritious stage. For example, tomatoes should be harvested when fully colored and slightly soft to the touch. Leafy greens, however, are best when tender and before they reach full maturity. Below is a table listing common garden vegetables and their signs of peak ripeness:
| Vegetable | Indicators of Ripeness |
|---|---|
| Tomatoes | Deep color, slightly soft |
| Leafy Greens | Tender leaves, vibrant color |
| Cucumbers | Firm, bright skin, medium size |
| Peppers | Firm, glossy skin, full color |
Preservation and Canning of Garden Vegetables
I use canning to preserve the freshness of my garden vegetables, ensuring that my pantry stays stocked through the offseason. The two main canning methods I use are water bath canning for high-acid foods like tomatoes and pressure canning for low-acid vegetables like green beans. It’s essential to use sterile equipment and follow proper canning guidelines to prevent foodborne illness.
Here are essential steps for water bath canning:
- Fill canner with water and preheat.
- Prepare jars and lids by sterilizing them.
- Fill jars with prepared vegetables, leaving headspace.
Sharing Your Harvest with the Community
After satisfying my own needs, I believe in sharing the bounty of my victory garden with my local community. I connect with community kitchens, food banks, and neighbors to distribute excess fresh vegetables and fruits, ensuring none of my harvest goes to waste. Participating in a community garden also allows for a collective sharing of the harvest, where all contributors can enjoy the range of fresh produce available.
💥 Tip: Organize a harvest swap in your neighborhood. This fosters community spirit and allows everyone to enjoy a variety of garden-fresh goods.
The Impact of Victory Gardens on Families and Communities
During the world wars, Victory Gardens became a symbol of self-reliance on the American home front. I found that growing my own food not only bolstered food security but also nurtured a sense of unity and purpose among family and community members. The act of gardening served as an excellent source of exercise and offered morale boost during times of uncertainty, such as the pandemic and war.
💥 Engaging in victory gardening meant contributing to the war effort right from our backyards.
For families, having a home garden provided a way to cope with rationing and reduced household costs. It was a daily reminder of the resilience and power in home gardeners to support their families and the military abroad. Eleanor Roosevelt’s establishment of a Victory Garden on the White House lawn epitomized this drive and encouraged the entire nation to participate.
Engaging communities through community gardens fostered camaraderie and shared responsibilities. These spaces were not just for cultivating plants but also relationships, reinforcing neighborhood bonds and shared accomplishments. Here, every carrot and potato harvested was a small yet significant win, a visible token of contributing to the wider war effort.


