

Crocus bulbs, which are actually corms, are a herald of spring, often emerging even when patches of snow are still visible. I find that the best time to plant them is in the fall, before the first frost. This allows the bulbs to establish themselves and go through the necessary cold period over winter, which is essential for them to break dormancy and flower in spring.
In my experience, late summer to early fall is the ideal time to plant crocus bulbs.
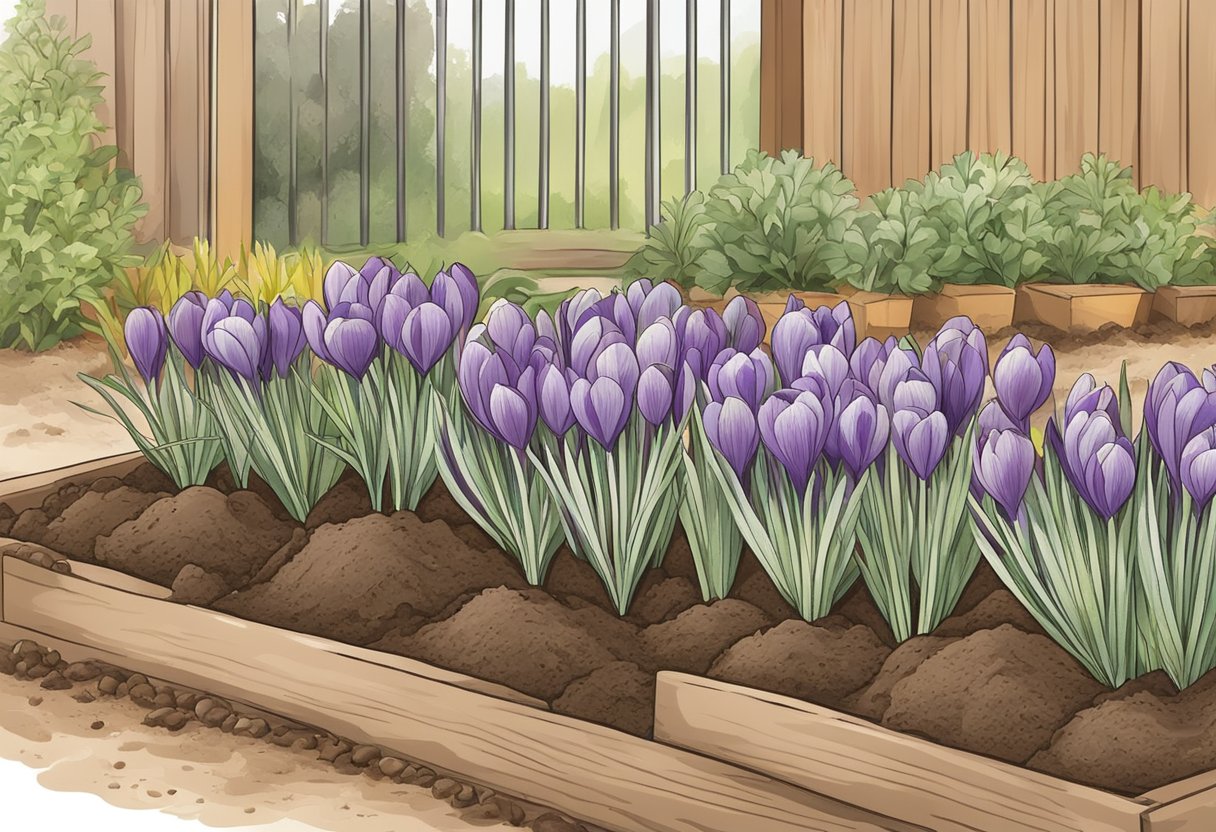
I’ve also observed that these flowers require a minimum chilling period of 15 weeks to properly break dormancy, which is why planting too late in the fall could result in a missed bloom season. To ensure a beautiful spring display, I make sure to get my corms in the ground at the right depth—about 3 to 4 inches deep—and spaced a few inches apart. Planting them in groups or clusters, rather than singly, ensures a more striking display when they bloom.
JUMP TO TOPIC
Getting Started with Crocus Cultivation
Crocus cultivation marks the arrival of spring with their vibrant blooms. As a gardener, I ensure successful crocus growth by understanding the corms and selecting an optimal planting site.
Understanding Crocus Bulbs
Crocus bulbs, or correctly referred to as corms, are hardy perennials that provide some of the earliest flowers in the garden. They require a period of cold dormancy before they can sprout. I plant the corms in late summer to early fall, ensuring at least 15 weeks of chilling time before spring. This chilling is crucial for breaking the bulb’s dormancy and preventing premature growth that could be damaged by cold weather.
I’ve observed crocus flowers do best when they’re planted about 3-4 inches deep. They tend to naturalize, meaning they come back year after year and even multiply. The key to this longevity is the right planting time and soil conditions, which brings us to the next important point: choosing the planting location.
Choosing the Right Planting Location
Selecting the right location is imperative for planting crocus. They thrive in an area that offers plenty of sunlight and well-drained soil. I aim to avoid soggy areas as this can lead to rot. The ideal soil for crocuses has a neutral pH and could be improved with soil amendments if needed.
To maximize growth, plant crocus corms in well-drained soil with a neutral pH, in a location that receives plenty of sunlight.
In my gardening experience, crocus corms have proven hardy in most locations; they can be planted in lawns or garden beds alike. However, they stand out best when planted in clusters or groups rather than individually. Clusters create a more significant visual impact and help the plants support each other.
By ensuring the right planting depth and spacing in an optimal location, I can look forward to a beautiful display of crocuses when spring rolls around.
Step-by-Step Planting Guide
Planting crocus bulbs requires proper soil preparation, specific planting techniques, and dedicated post-planting care. I’ll guide you through each step to ensure your crocuses thrive.
Preparing the Soil
Before I plant crocus bulbs, I make sure the soil is well-draining and loose. I mix in sand, peat moss, or compost if necessary to improve drainage and soil structure. Crocus bulbs do not fare well in soggy conditions.
Planting Techniques
When it’s time for planting, typically six to eight weeks before the first frost, I follow these steps:
- Choose a sunny to partially sunny location.
- Dig holes 3-4 inches deep.
- Position the bulbs with the pointed end up.
- Place the corms 3 inches apart.
- Cover with soil and pat down gently.
I water the area thoroughly after planting, as this is crucial for initiating root development.
Post-Planting Care
After planting, I ensure the soil isn’t allowed to dry out completely. Watering is especially important if rainfall is insufficient. As spring approaches, I check the soil moisture regularly and water if needed.
Avoid overwatering as this can lead to bulb rot.
Regularly I check for sprouts as spring nears. Once the crocuses bloom, I deadhead flowers if desired but leave the foliage until it dies back naturally, allowing the bulbs to gather energy for the next season.
Seasonal Crocus Care and Maintenance
In my experience, maintaining crocus plants is relatively straightforward but requires attentiveness to seasonal changes. Proper fertilization, watering, pest control, and adjustments for seasonal shifts are key to thriving crocus beds.
Fertilization and Watering
💥 Key Spotlight
For optimal growth, crocuses require well-draining soil and moderate moisture. I recommend feeding the crocuses with bulb fertilizer in early fall, as this is when they start developing roots and need additional nutrients. It’s best to water them thoroughly after planting and lightly during the spring if the season is particularly dry. Overwatering or poorly drained soil can cause the bulbs to rot.
Managing Pests and Diseases
Squirrels and other rodents can be a nuisance as they sometimes dig up and eat crocus corms. To deter these pests, I often plant corms in wire cages or sprinkle blood meal around the planting area. Monitoring for common diseases like corm rot and rust is important, especially when the weather is wet and mild. I keep an eye out for any signs of discoloration or wilting and remove any diseased plants promptly to prevent spread.
Seasonal Adjustments
Crocuses are perennial and require minimal adjustments once established. However, I find that mulching in the fall helps protect the corms during the winter, and removing the mulch early in spring allows the flowers to push through easily. After blooming, I let the foliage die back naturally, as this helps the plant store energy for the next season. I also adjust light exposure by ensuring overhanging branches are trimmed to maintain the necessary sunlight.
Enjoying and Expanding Your Crocus Collection
As I’ve nurtured my crocus collection, I’ve reveled in the vibrant display that heralds spring’s arrival. Through thoughtful planting and propagation, I’ve expanded the variety and impact of these charming blooms across my landscape.
Blooming Patterns and Color Varieties
In spring, crocuses burst into a tapestry of color, from the purest whites and soft lilacs to striking stripes of deep purple. I find it fascinating how crocus blooms at different times, depending on the variety. My collection now includes:
- Precocious Reds and Yellows: They often peek out even when snow lingers, offering the first hues of the season.
- Royally Rich Purples: These are the traditional flag bearers of the genus, paying homage to the flower’s regal history.
- Delicate Pinks and Whites: These less common colors add a soft, pastel elegance to the ensemble.
Naturalizing Crocuses in Your Landscape
Over time, I’ve learned that crocuses naturally multiply and spread, a process known as naturalization. By planting them in undisturbed lawns, beneath deciduous trees, or along borders, I’ve encouraged their spread, enhancing my garden’s naturalistic design. Here’s a quick guide:
- Plant in informal groups or drifts for a more natural look.
- Choose a sunny location with well-drained soil to avoid waterlogging.
- Ensure that the space allows for spreading, so there’s no need to divide or move corms frequently.
Propagating and Sharing Crocus Corms
With a single crocus corm, I unlocked an ever-growing collection. After several years, corms create dense clumps that benefit from being divided. I separate them gently and share with friends, or expand into new areas of my garden. Here’s how to propagate:
💥 Tips on Propagating Crocus Corms
- Dig up the clumps after foliage has died down but before they disappear completely.
- Keep the healthiest looking corms and dry them in a shaded, well-ventilated space.
- Replant these corms in autumn, placing them at 3-4 inch depths for optimal growth.


