

Starting seeds indoors is a strategic approach to gardening that can yield remarkable results. For many gardeners, this kickstarts the growing season, particularly in areas where the winters are long and the spring planting window is short. My experience in gardening has taught me that the optimal time for indoor seed initiation is based on the last frost date of the region—a pivotal piece of information that dictates not only the start time for indoor seeding but also the transition of seedlings to the outdoors.
To pinpoint the suitable timeframe for germinating seeds indoors, I count back 6 to 8 weeks from the anticipated last frost date. This timetable aligns the plants’ growth with the seasonal shift to warmer weather, ensuring that seedlings are robust enough to survive transplantation.
Every plant variety has its specific needs, and recognizing these preferences is crucial in achieving a flourishing garden. Tomatoes, peppers, and eggplants, for example, are typically started indoors as they require a longer growing period before setting fruits. Conversely, root crops like carrots and radishes fare much better when sown directly into the garden soil due to their sensitive root systems. I ensure that I refer to a reliable seed-starting chart which provides a tailored schedule based on my region’s frost dates, taking into account not only the perfect start times indoors but also the right moments to transplant, optimizing each plant’s potential for growth.
JUMP TO TOPIC
Choosing the Right Seeds
When starting seeds indoors, I always prioritize selecting the highest quality seeds and understanding the timing based on plant hardiness and local frost dates.
Evaluating Seed Packets and Species
I meticulously inspect seed packets before purchase, ensuring that I choose ones with the most viable and healthy-looking seeds, as they have the best chance at successful germination. A general rule I follow is to pick seeds from species that are well-suited for indoor growing. For example, vegetables like tomatoes and peppers, or flowers such as marigolds and sunflowers, tend to thrive in these conditions.
List of my favorite seeds to start indoors:
- Tomatoes – They require warmth and grow well indoors.
- Peppers – With enough light, they can flourish before transplanting.
- Lettuce – Quick to sprout and doesn’t need deep soil.
- Marigolds – Great for beginners due to their easy care.
- Sunflowers – They have larger seeds, which are easier to handle.
I also prefer seeds labeled for high germination rates and those that come with a clear description of the growing conditions and care required, which helps me in planning the growing season more effectively.
Understanding Plant Hardiness and Last Frost Date
To ensure optimal growth, I take into account the USDA hardiness zone specific to my area, which informs me about which plant species can survive and thrive here. In conjunction with this, knowing the last frost date is critical because it dictates when I can safely transfer my seedlings outdoors.
For perennial flowers, which come back year after year, timing isn’t as strict since they’re more tolerant of varying conditions. However, for annuals and most vegetables, I always time my seed starting so that the seedlings are ready to go outside following the last frost date.
Do not plant frost-sensitive seedlings outdoors before the last frost date in your region.
My method is to count back from the last frost date and start seeds indoors accordingly, typically 6-8 weeks before this critical date for most species. This gives my plants enough time to establish themselves without the risk of frost damage.
Prepping for Seed Starting Indoors
To successfully start seeds indoors, focus on selecting the right seed-starting mix and containers and creating optimal conditions for growth, including light, temperature, and humidity.
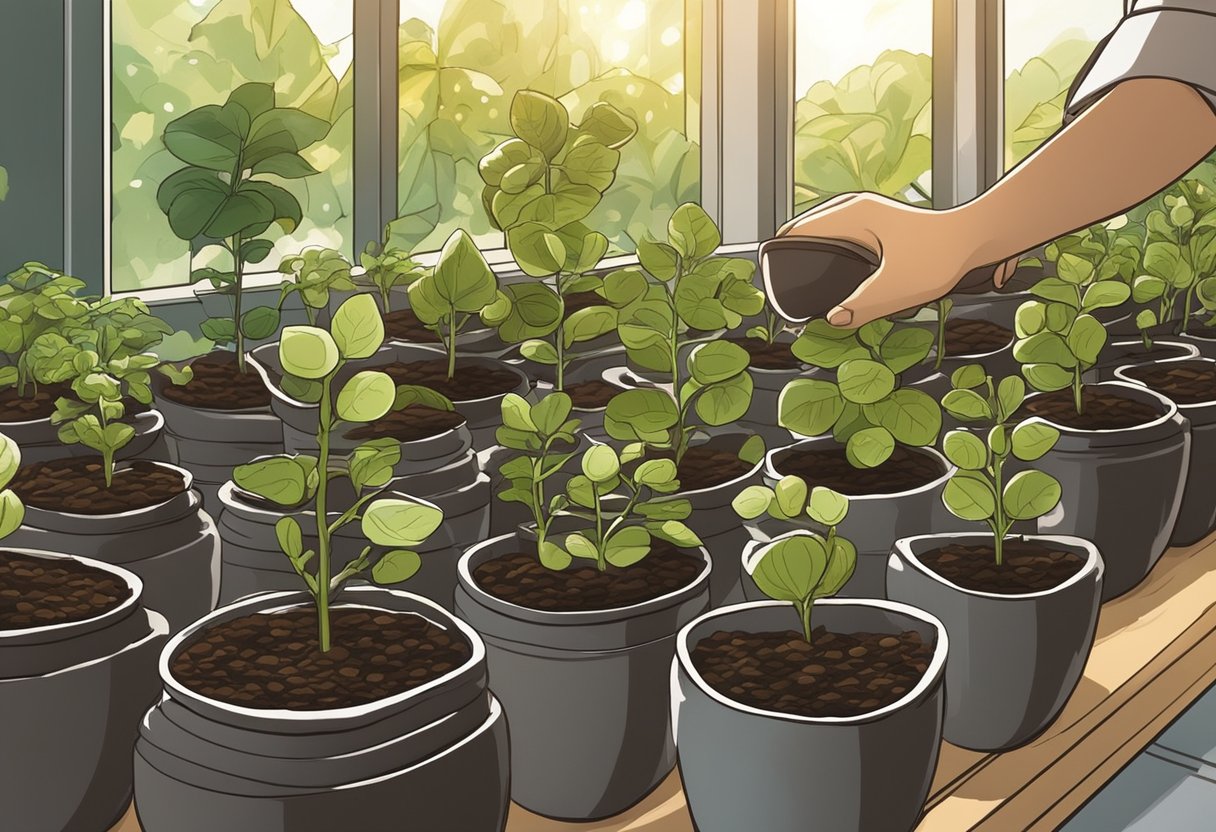
Seed-Starting Mix and Containers
Choosing the correct seed-starting mix is crucial for the development of young plants. I use a mix that’s specifically designed for seed starting, as it is sterile, free of disease, and contains a balance of materials like peat, vermiculite, and perlite that promote aeration and moisture retention. Peat moss forms the base of most mixes, with perlite and vermiculite ensuring the mix doesn’t compact, which allows for delicate roots to grow easily.
- Reuse pots from previous seasons after disinfecting them to reduce waste.
- Biodegradable pots allow for transplanting without disturbing the roots.
- Ensure any container includes holes at the bottom for proper drainage.
Creating Optimal Growing Conditions
Light and temperature play pivotal roles in plant germination and growth. Upon starting seeds, I ensure they receive ample light, either from a bright south-facing window or grow lights for 12 to 16 hours each day. Maintaining a consistent temperature of 65-75°F encourages optimal seed germination. I use a thermostat-controlled heat mat to achieve this.
Humidity and moisture control are just as significant. Too dry and the seeds won’t germinate; too wet and they risk fungal disease. I cover seed containers with plastic or a humidity dome to trap moisture until seeds sprout, then I remove the cover to allow air circulation and prevent mold growth.
💥 Pro Tip: Check moisture daily. The seed-starting mix should feel like a well-wrung sponge—not soggy, yet never completely dry.
Growing and Caring for Seedlings
After germination, your main focus should shift to the proper care to ensure the healthy growth of the seedlings. Key points involve consistent monitoring and adjustment of water, light, and nutrients.
Monitoring Water, Light, and Nutrient Needs
Water: Seedlings require consistent moisture but can easily be overwhelmed by waterlogged conditions. My approach is to check the topsoil daily using my finger; it should be moist but not soaked. I use a tray beneath the seedling pots for bottom watering, which encourages strong root growth as the roots grow down in search of water.
💥 Watering Tip:
Too much moisture can lead to fungal diseases such as damping off, which is deadly for seedlings. Proper drainage in seedling containers is essential to prevent this.
Light: Seedlings need lots of light to develop into strong plants. I make sure they get 12-16 hours of light daily, preferably from grow lights, as these provide a consistent light source which is often more reliable than sunlight through a window.
Consistent grow light exposure prevents the legginess often seen with insufficient light.
Nutrients: Initially, the seedling can rely on the nutrients present in the seed itself. As they grow, I introduce a balanced, water-soluble fertilizer at a quarter strength, gradually increasing the concentration as they mature.
Feeding too much, too soon can burn delicate seedling roots. Always err on the side of caution with fertilizer strength and frequency.
Hardening: Before transplanting seedlings outdoors, they need to be acclimatized to the outside conditions through a process called hardening off. I begin this process about two weeks before the last expected frost, gradually increasing their exposure to outdoor temperatures and sunlight.
It’s crucial to keep a close eye during hardening off, as seedlings can be easily damaged by harsh weather, strong winds, and rapid temperature changes. Once they are hardened, they’re ready to face the outside world, and the risk of transplant shock is significantly diminished.
Transplanting to Outdoor Garden
Before moving young plants from their indoor sanctuary to your outdoor garden, ensure they are properly acclimated and that you choose the optimal time for transplanting to encourage a successful growing season.
Hardening Off Young Plants
To prepare my indoor-started seedlings for the outdoor conditions, I follow a process called hardening off. This increases their resilience to weather changes, sunlight, and temperature fluctuations. Here’s how I harden off my plants:
- Begin 7-10 days before the planned transplant date.
- Set the seedlings outdoors in a shaded, sheltered area for a few hours.
- Gradually increase their time outside each day.
- Expose them to more direct sunlight and varying temperatures.
- Make sure to bring them inside if there’s any risk of frost.
Sowing in the Ideal Season
Timing is crucial when transplanting seedlings into the garden. I base this timing on the frost-free date for my region, aiming to transplant after this date has passed to avoid cold damage to the tender young plants. Here’s a guideline I use for transplant timing:
Most seedlings are ready to move outdoors 2-4 weeks after the last frost date. For summer harvest, I transplant in late spring. I monitor the forecast, and if a late cold snap is predicted, I delay transplanting or protect my seedlings with covers.


