

Anemones are a vibrant and diverse group of flowers that can bring bursts of color to any garden. My experience with planting anemone bulbs has taught me a useful aspect of these charming blooms: they are quite forgiving when it comes to their planting orientation. Unlike many other bulbs that require precise positioning in the soil, anemones will thrive even without strict adherence to an ‘up’ or ‘down’ placement.
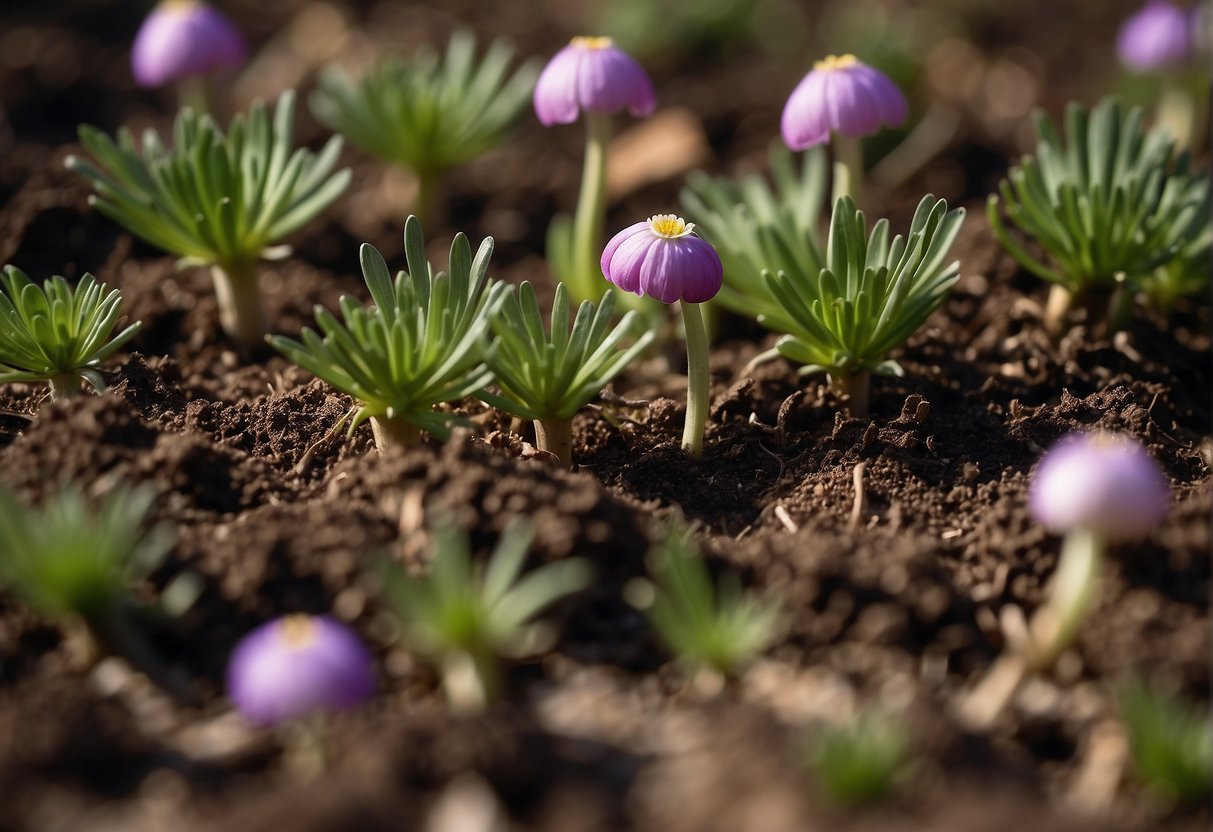
Anemone bulbs, often referred to as corms, do not require a specific orientation when planting. These resilient plants will grow regardless of whether they are placed ‘right-side-up’ or ‘upside-down.’
While this takes some of the guesswork out of planting, there are still a few simple tips to ensure their successful growth. To aid gardeners, I have observed that soaking the bulbs prior to planting can accelerate their sprouting. It’s recommended to soak anemone bulbs in water for several hours before setting them in well-drained soil, allowing the corms to plump up, which may facilitate stronger growth once planted. After soaking, plant the bulbs in light soil at a depth of about 3 to 4 inches apart, ensuring enough room for them to expand and flourish.
JUMP TO TOPIC
Preparation for Planting
When getting ready to plant anemone bulbs, it’s essential to consider the quality of the bulbs, the soil preparation, and the appropriate planting time.
Selecting Quality Anemone Bulbs
I always look for firm, mold-free bulbs. The larger the bulb, the more likely it is to produce a healthy plant with multiple flowers. I avoid any bulbs that are soft or displaying signs of rot.
Understanding Soil Types and Sunlight Requirements
Anemones thrive in full sun to partial shade. In my garden, those that receive morning sun and afternoon shade tend to do the best.
Anemones prefer well-drained soil rich in organic matter. I work in compost or aged manure to improve soil fertility. A balanced mix of sand, loam, and compost works well for these bulbs, ensuring good drainage.
Planting Time and Hardiness Zone Considerations
In my experience, planting time largely depends on your hardiness zone. For zones 6 to 8, I plant bulbs in the early spring when the soil has begun to warm. Those in colder or warmer climates might need to adjust the planting time to ensure bulbs aren’t damaged by frost or heat.
| Hardiness Zone | Recommended Planting Time |
|---|---|
| 6 | Early spring |
| 7 | Early spring or fall |
| 8 | Fall or early spring |
Anemone Planting and Care
In my experience, planting anemone bulbs, also known as corms, is straightforward, and they require minimal ongoing care to thrive. Positioning the bulbs correctly and providing the right soil conditions are key steps to ensure a beautiful anemone display.
Planting Anemone Bulbs
Anemone bulbs do not have a designated “top” or “bottom”; they can be planted in any direction and will still grow properly.
Before planting, I soak the anemone bulbs in water for several hours to hydrate them, which encourages faster germination. Here’s my process:
- Choose a well-drained location with partial shade to full sun.
- Prepare the soil by adding compost or well-rotted manure for nutrients.
- Dig holes about 3-4 inches deep and space bulbs approximately 3 inches apart.
- Place the anemone bulbs into the holes and cover them with soil.
- Water thoroughly to settle the soil around the bulbs.
Ongoing Maintenance and Care
After planting, anemones are relatively low-maintenance. Here are my care tips:
- Watering: Keep the soil moist but not waterlogged to avoid rot. Anemones are drought-tolerant once established, so I reduce watering.
- Fertilizing: Twice a year, in spring and fall, I apply a balanced fertilizer to promote healthy growth.
- Mulching: To keep the soil moist and protect against frost, apply a layer of mulch around the plants in colder climates.
Anemones are adaptable plants that reward a little care with vibrant color and form. By following these procedures, my anemones perform exceptionally well every year.
Seasonal Considerations and Protection
Timing and preventative measures are crucial for healthy anemone growth. I find addressing seasonal shifts and safeguarding against pests and diseases key to nurturing these blooms.
Addressing the Changing Seasons
Anemones require specific planting times depending on the variety. For fall-blooming species, I plant in early spring to ensure a flourish of blooms before winter sets in. Conversely, spring bloomers need planting in the fall. Frost is a notable concern; tender anemones can suffer if unexpectedly exposed. To shield them during chilly months, applying a layer of mulch provides insulation, preserving the bulbs as they lie dormant. As the season warms, I monitor the moisture levels carefully, as excessive rain can lead to bulb rot, especially in improperly drained soils.
Protecting Anemones from Pests and Disease
In my experience, anemones can attract certain pests, such as slugs, which find their foliage appetizing. Regular inspections help me take early action. I also watch out for powdery mildew, a common fungal issue that enjoys damp conditions. Ensuring good air circulation and avoiding overcrowding can significantly reduce disease risk. If signs of infection or infestation appear, I act swiftly with appropriate organic or chemical treatments, always following guidelines to minimize environmental impact and maintain a healthy garden ecosystem.
Designing with Anemones in the Garden
Anemones are a versatile addition to any garden, capable of creating a radiant carpet of color and supporting a healthy ecosystem with their bloom. When used effectively, they elevate the aesthetic and ecological value of garden spaces.
Incorporating Anemones into Garden Designs
I often incorporate anemones into garden designs due to their ability to bloom enthusiastically in both full sun and partial shade. These flowers adapt well to various yard settings, and their spring bloom adds life and vibrancy to garden borders. Anemones can serve as an eye-catching groundcover or can be strategically placed to lead the eye through the garden’s composition.
Their height and structure allow them to stand out against lower-growing plants, offering a layered effect to the planting scheme. By spacing anemones six inches apart, I ensure they have enough room to form a dense mat, not only providing a carpet of color but also suppressing weeds.
Anemones thrive in full sun to partial shade conditions.
Pairings and Creating a Carpet of Color
My approach to creating a carpet of color with anemones often involves pairing them with early spring bulbs such as tulips and daffodils. As these companions fade, the anemones rise, extending the bloom season. In the company of other perennials, anemones contribute to a robust display that attracts pollinators like bees and butterflies, vital for a healthy garden.
To achieve this, I plant groups of anemones amidst these companions, ensuring the mix of colors and textures offers a continual feast for the eyes through the season. My advice is to play with contrasting or complementary hues to craft a visual spectacle that reflects the desired mood and style of the garden.
- Bulbs: Tulips, Daffodils
- Perennials: Ferns, Hostas


