

How to revive a fern is a common question that plant keepers tend to ask as the plant starts showing different signs, and the plant lover would aim to make it look fresh again.

Ferns are lovely additions to any greenhouse plant collection and ideal houseplants for your bathroom or kitchen that love humidity.
However, you might see a fern dying for various reasons like under watering, pest infestation, lack of or excess sunlight, and uncontrolled humidity. This guide consists of simple steps to help you revive a Boston fern, so keep reading to find out how!
JUMP TO TOPIC
How To Properly Revive A Fern?
To revive a fern, you must increase the humidity, provide adequate watering, give it some shade, invest in a humidifier, and provide the right temperature. In addition, you must also create a micro climate for the humidity, tackle the root rot, mist and repot it, and properly fertilize it.
1. Increase Humidity
Place your fern in a location with a naturally higher humidity level, such as a bathroom or kitchen. Bathroom air is frequently significantly more humid than air in any other room, and it most nearly resembles the humidity found in the ferns’ native environment.

When the humidity falls below 30 percent, certain species, like the Boston fern, respond by shedding their leaflets or leaves, turning brown or yellow. The leaves don’t dry out due to less water evaporating from them.
A fern may die due to lack of water or low humidity, which dries out the leaves and causes them to turn brown and crispy. Indoor ferns require moist soil and a humidity level of 50 percent to keep their leaves from turning brown and dying.
2. Provide Adequate Watering
It is essential to maintain a regular watering schedule to keep the soil moist; however, only water until the soil is completely soaked. The ferns would grow best in soil rich in organic matter and have good drainage, preventing the roots from ensconced in muddy water.
Plant ferns in compost are rich in organic matter to keep the moisture surrounding the roots of the plant stable throughout time.
Whenever necessary, water the soil to maintain an even moisture level, which is exactly how often depends on the climate, but if the leaves are wilting or turning brown and the soil seems dry, you are probably under-watering your fern.
You must remember that there is no fixed schedule for watering because it depends on the plant’s size and the space’s relative humidity. However, to ensure that the soil is moist but not saturated, constantly probe the ground with your finger.
Always water deeply and check to see if the moisture has soaked the roots where it is required by letting excess water drain out of the drainage holes.
3. Provide Some Shade
Find a place in your house that’s not facing direct sunlight because this will dry out the soil and scorch the leaves, resulting in brown foliage. You may be keeping your fern in a place where it is receiving some harsh light which is stressing it, hence it is becoming more gloomy and even dropping the leaves, remember that ferns do best in shady areas.
For it to thrive, your fern will need access to an average quantity of indirect sunlight, you may place it behind a curtain, where light will pass but not in a harsh way. In addition, you may also have to alter where your ferns are placed. You must be aware that too much sun can be as harmful as none.

You should transfer your fern to a window that faces north if you are concerned that it is receiving direct sunlight. Your indoor fern might be able to thrive with only this minor change.
Also note that the same rule applies to your outdoor fern. You can plant it in a different location if it receives excess sunlight. This could save your fern from ultimate death, in such a smooth way.
4. Invest in a Humidifier
The best thing you can do to revive ferns is to purchase a humidifier. This is, without a doubt the best method for replicating your fern’s original humid environment and creating humid conditions around it.
Of course, if you live in an area where the humidity level is very low, and there is extensive drought, then, you can invest in a humidifier, and place it around the plant, which will slowly but surely revive.
You may achieve the right degree of humidity for ferns to flourish by using a humidifier, which allows you to precisely regulate the humidity percent to the ferns’ optimal range.
A humidifier is significantly more effective than other techniques of increasing humidity in reviving your fern. This reduces water evaporation from the leaves and provides the optimal environment for your fern to recover.
5. Provide the Right Temperature
Ferns frequently lose their leaves due to differences in temperatures, significantly outside their preferred temperature range of 65 and 75 degrees Fahrenheit.
Keep the fern away from forced ventilation systems or air conditioners that generate air currents or drafts. As these temperatures would fluctuate the area, the atmosphere or the norm of the fern would be unstable.
The on-and-off cycles of the heating and cooling systems provide a variety of conditions for ferns, resulting in plants turning brown as a sign of stress as the temperature varies throughout the year, and slowly your plant may start to die.
What you must do is place your fern in an area without droughts to lessen water loss from the leaves.
It is also recommended to control the temperature of the water used for watering the ferns. Most indoor ferns are tropical plants, so watering them with lukewarm water imitates their natural habitat. If the water is too cold, their fragile roots may suffer shock, causing the leaves to turn brown.
6. Create A Humid Micro-climate
To elevate the humidity levels, increase the number of plants in that area, and this will create a moist ecology.
As the houseplants would be clustering a few of their leaves together, you can help create a humid microclimate around your fern that can facilitate its recovery and revival and mimic the kinds of growing conditions it would experience in its natural habitat.

You would see that one plant would be helping the other, and they would be surrounding the fern with a better place to live and revive.
Place your fern away from heat sources, air currents, and drafts. Maintaining the proper humidity level is essential for your plant’s recovery so keep it clear of any drafts and away from artificial heat sources that might dehydrate the leaves.
7. Tackle Root Rot
What you must remember when you are keeping a fern is that they thrive in damp soil, but their owners frequently overwater them because they underestimate how much water they require. Due to their dark-colored root systems, root rot is quite difficult to recognize on ferns.
This can make it challenging to identify deterioration or rot symptoms. The only way to determine if your fern is impacted is to remove it from the soil and feel the roots for indications of mushiness. The infected roots may emit a bad stench, and the stink may gradually permeate the soil. Your fern’s leaves will be impacted if the roots get moist and water-logged.
Your plant’s growth will be hindered because a fern with root rot won’t obtain any nutrients from the soil. Your fern leaves may fall off altogether if root rot is not treated. If the root rot in your fern is still in its early stages, it is advised against taking any immediate action and instead letting the plant dry out.
What you must do is let the soil entirely dry out. It is advised to test the proper moisture in the soil with a popsicle stick before watering again. Pushing the stick into the dirt and feeling for any residue are the two very simple steps in this process.
Wait a few more days and retest the soil if it’s still wet. Ferns that have experienced severe root rot should be repotted in fresh soil, and the old, infected soil should be thrown away immediately. You should consider transplanting your fern to new and healthy soil.
When the fern is overwatered, this simply creates a stressful ambiance to it, and as a result, it develops fungi such as root rot. As you tackle the root the plant will revive again.
8. Prevent Fungus Gnats
Fungus gnats are small, darkly colored insects that resemble mosquitoes and are members of the Sciaroidea family. They dwell and reproduce on fern leaves and soil.
Normally, they pose no threat to people or plants, but if an infestation is allowed to spread, it may result in larvae eating your fern’s roots by tunneling into the ground. Due to the damp soil, it makes a great home for fungus gnats, ferns are particularly vulnerable to them.
It is generally observed that setting up an apple cider vinegar and liquid soap trap for fungus gnats is an efficient way to get rid of them, as this is a fairly straightforward technique.

First, add two cups of apple cider vinegar to a bowl. Next, you must add a few drops of liquid soap next to a small plate or saucer; after that, submerge the dish so it floats on top of the vinegar in the bowl.
Placing the bowl close to the infected fern should cause the gnats to move away from the plant and toward the bowl, where they will be attracted by the dish soap and become trapped.
Every few days, wash, empty, and replace the bowl and saucer with new ingredients. Your fern should start to show signs of improvement after one week and should be free of fungus gnats after one month.
9. Mist Your Fern
If ferns don’t get the level of humidity they need, the effects can vary greatly depending on the species. The edges of the leaves could start to brown, and the leaves themselves could get dry.
The remaining leaves may drop and start turning yellow if this persists. You may see these stressful signs in the beginning phase, if you don’t fix them it may be too late to do so in the long run.
To give the fern some moisture, spray it several times each day with some water, this will subject glossiness to the leaves. Simply misting its leaves daily can help it achieve the required humidity levels.
The reason why misting is important is that it would give further moisture to the leaves, so that the leaves would generate further, other than the water they would receive from the soil. On another note, it would also help retain the water in leaves prevent them from dehydration, and lead the process of photosynthesis to be successful.
In order to revive the dying fern with brown leaves, it is essential to reproduce the fern’s natural environment. You can achieve this by increasing the humidity level, planting the fern in wet organic soil, and placing it in a shaded area with a relatively chilly temperature.
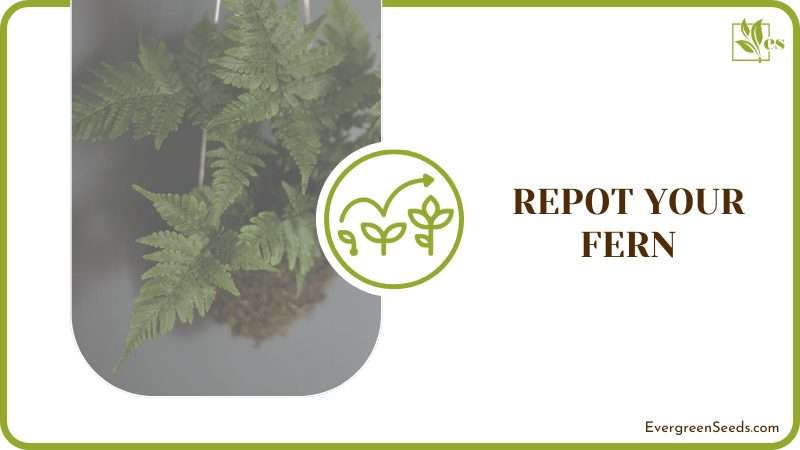
10. Repot Your Fern
You can completely repot your fern into new soil if you’ve tried everything else to try to renew it or if you think it’s gone too far to benefit from it. This is particularly significant if your plant has severe root rot or if your fern has been severely harmed by a disease that might live in the soil.
The reason you must do this is because the plant must have grown but then stopped, due to the compactness of the soil. On another note, this would also mean that the roots would overlap each other, and the plant would look very droopy.
Start by carefully separating the roots from the soil before repotting your fern. Use your hands to remove any extra soil gently, then a stream of water to wash away any. If some roots begin to break off as you wash them, don’t get upset. Numerous illnesses, such as root rot, can weaken and harm the roots.
On another note, having a sterilized pruning tool or kit is ideal for cutting away any mushy or damaged roots that are present because they are no longer feeding your fern with nutrition.
If any infected roots need to be removed, use a liquid fungicide to clean the remaining roots. This should stop any disease from spreading to the healthy roots that are still present.
11. Follow A Fertilization Schedule
If your fern has been afflicted by disease or pests, some of its nutrients have probably been extracted from the soil and leaves. Regular fertilization of your fern should be a part of your maintenance routine, but you should also add fertilizer to the soil of your fern when it is recovering.
Normally, it would be best to fertilize your fern once each month. The use of a typical liquid houseplant fertilizer is one option.
This lessens the possibility of overfertilizing your fern, which may result in leaf withering and brown, crispy edges. Only during the warmer months, when the ferns’ active growing period is present, should ferns be fertilized, of course as the soil must have plenty of nutrients and minerals so that it would successfully live.
Final note:
Indoor ferns are usually low-maintenance and can thrive easily. However, occasionally you might observe dried and yellowing leaves.


